TM 55-203
18-29. Steel-Wheel Gage
a.
Before a pair of wheels is put in the lathe,
each wheel should be taped and gaged with a steel-
wheel gage at the point where the flange and rim are
thinnest. The gage should be applied to at least three
points around the circumference and at least a quarter
circle apart. The tape size, the rim thickness, and the
amount to be turned off the tread to restore the contour
as read from the gage should be chalked on the
backplate of each wheel. On some wrought-steel
wheels, especially those that have been in service a
long time, the inside edge of the rim is not clearly
defined because the surface is rounded at the point
where the scale on the long leg of the wheel gage
should intersect the line of the inside surface of the rim.
Where such a condition is encountered, a straightedge
may be applied to the inside surface of the rim to protect
the line of this surface over to the scale on the edge of
the gage, and the gage reading may be obtained at the
point where the straightedge intersects the scale.
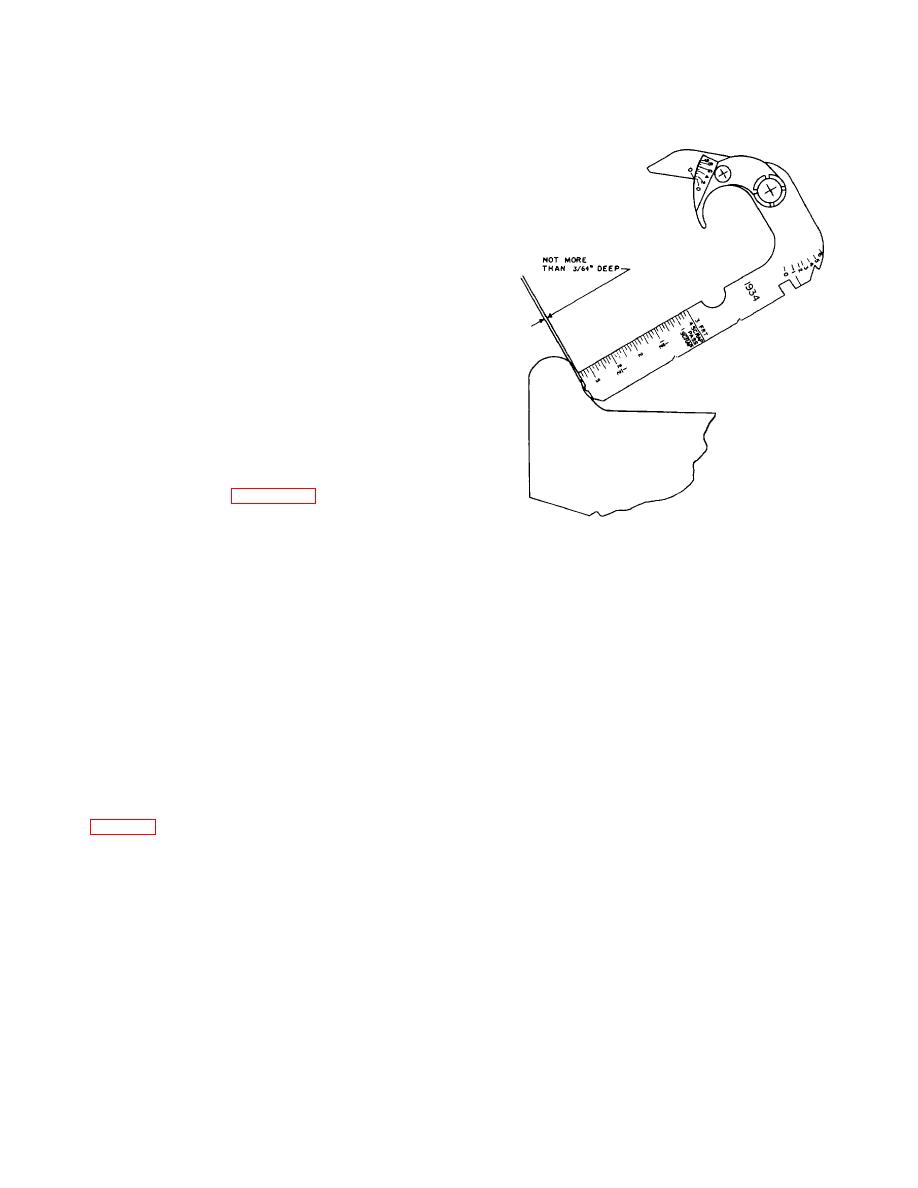
b.
The steel-wheel gage is so calibrated that,
when applied as shown in figure 4-26 with the leg flat
against the back of the rim and the end of the movable
finger pressed against the face of the flange, the scale
on the finger will show in sixteenths of an inch the
Figure 18-7. Method of applying steel-wheel gage to
amount of metal to be removed at the center of the
check depth of witness groove in flange.
tread in order to restore the flange contour to the
witness groove. The 0 mark on the finger corresponds
machines are used for this purpose. In general, they
to a normal flange thickness of 1 5/32 inches, 5/8 inch
include mechanically or hydraulically operated clamping
above the baseline. The specification tolerance permits
blocks which grip either the wheel seat or the journal.
this dimension to vary 1/16 of an inch over but may
The headstock and tailstock have individual motors,
never be less.
each driving a tapered reamer or cutter which is
centered with the clamping blocks The design is such
c.
The witness groove in the flange serves two
that the axle can be rolled in and clamped by the blocks,
purposes. First, its presence in the finished turned
and the reamers can be fed into the ends of the axle
wheel shows that the lathe operator has not wasted
automatically until they reach an adjustable stop.
service metal by turning more off the tread than
necessary Second, if the wheel has a thin or vertical
18-31. Axle-Lathe Practice
flange, the witness groove saves 1/8 inch of service
metal each time a wheel is turned. However, the
a.
Axle lathes must be maintained so that lathe
witness groove must not be more than 3/64 of an Inch
centers are In alinement and the wear between the ways
deep (fig. 18-7) and must not extend into the throat of
and the tool carriages must be taken up so machining of
the flange. Owing to the important part the throat plays
axles is truly concentric and without taper or chatter.
in wheel service and safety, it is essential that these
Spindle bearings must be renewed when necessary to
limits for the witness groove be observed.
insure accurate turning.
Lathe centers must be
reground or renewed when they show signs of wear.
18-30. Centering or Recentering Axles
b.
The lathe tools used for finishing cuts on
Wheel shops should clean out the centers on
collars, journals, and wheel seats should have an edge
secondhand axles, using a grinder to remove any burrs
approximately 1 1/4 inches wide and be absolutely
or rolled-over edges. Heavy-duty stationary
straight except for a 1/8-inch radius at one side for
cutting the back or dust-guard fillet, or some other tool
arrangement must be used that will give equivalent
results. Separate tools must be used for the roughing
18-16


 Previous Page
