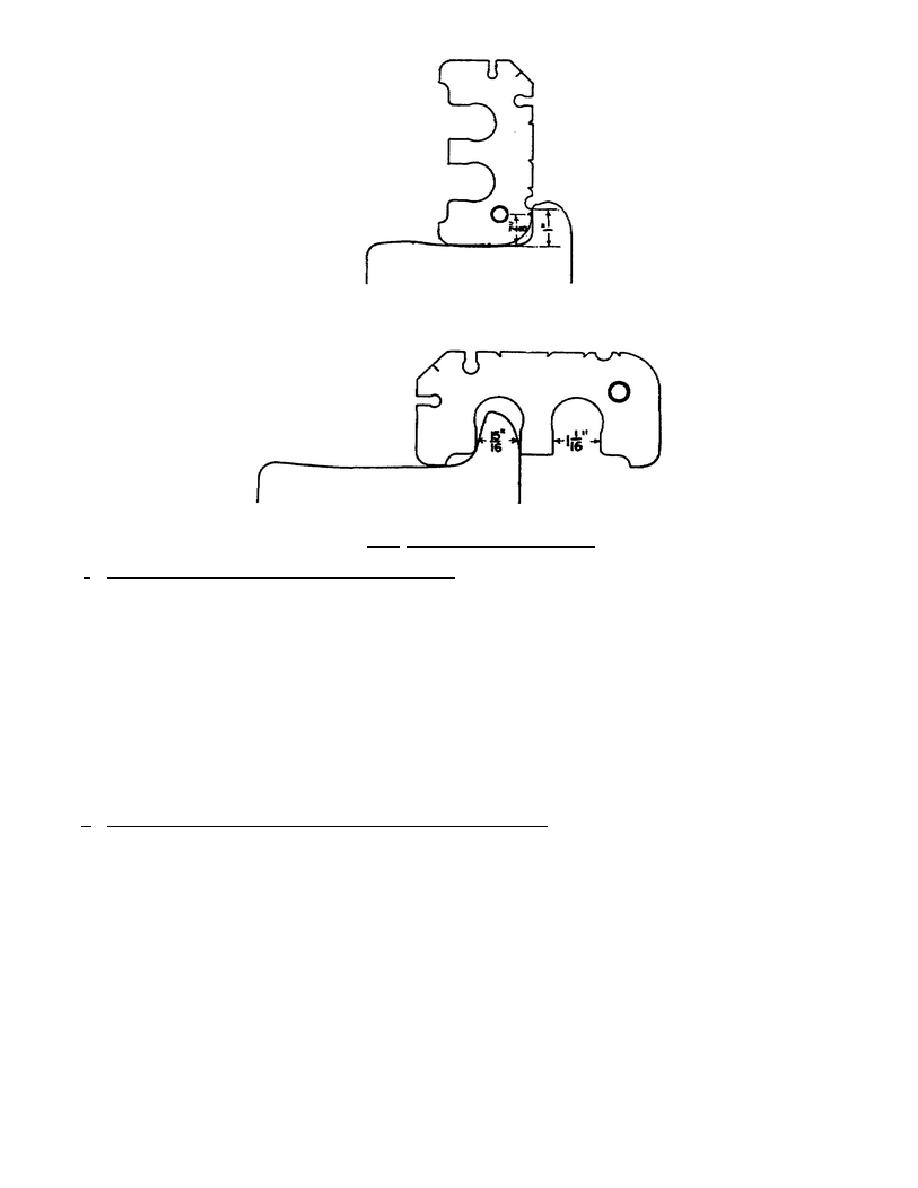
Figure 2.7. Measuring Worn Flanges.
f. Flange worn thin (Rule 74--AAR symbol 74-T). When the flange becomes too thin for safety, the defect
is known as "flange worn thin." The principal danger of the defect is the likelihood of the flange chipping or
breaking off and causing equipment to derail by riding up on a switch point. The sketch at the bottom of figure
2.7 shows the wheel-defect gage being used to measure a worn-thin flange. The limits of wear differ for the
same capacity ranges of cars as for the vertical Range. On cars of less than 80,000-pound capacity, when the
flange is 15/16 inch thick or less gaged at a point 3/8 inch above the tread, the wheel is condemned. On cars
with 80,000-pound capacity or more a wheel is condemned when the thickness of the Range measures 1 1/16
inches or less gaged 3/8 inch above the tread.
g. Combination tread defects (Rule 75-A--AAR symbol 75-A). Wheels may have a combination of shell-
out spots, flat spots, or worn flange. When any combination of these occur within a distance of 12 inches
measured circumferentially on the tread, the wheel is condemnable even though no single defect is as great as
the individual condemning limits. Combinations of shell-out spots 1 inch
19


 Previous Page
